Mobility has become a major buzzword in the health and fitness world. You hear it all the time and see it all over social media but do you question “I’m doing these mobility drills every day, and I still feel tight. Why am I still so tight? I feel like I should be seeing improvements in my mobility by now.”
Many people like you are stretching, foam rolling, or following mobility routines religiously—yet are still not seeing results. To understand why, we need to back up and revisit some anatomy basics.
First – What Makes Up a Joint?
When we talk about mobility, we’re really talking about joints—and joints are more complex than they may seem. A typical joint capsule includes:
- Bones articulating with one another
- Tendons and muscles that cause the movement you desire
- Ligaments (connects bones to bones)
- Bursa to aid with providing cushion
- Plus additional fibrous connective tissues to hold everything in place!
Tendons and ligaments are both fibrous connective tissues and as they approach the joint, they join the existing surrounding tissues to establish the capsule. Together, they form an integral part of the joint capsule, supporting joint stability and movement. So why does this matter? It’s important to note because knowing the consistency of tissue applies to how much load these joint should tolerate to gain more joint mobility thus range of motion!
NOW the big question – Mobility vs. Flexibility: What’s the Difference?
Mobility refers to joint motion—how freely and efficiently a joint can move through its full and available range of motion (ROM). Flexibility, on the other hand, refers to muscle lengthening—how much a muscle can stretch.
If you’re experiencing pain or symptoms at your end ranges (whether it’s tightness, sharp discomfort, or instability), it may be more than just a “mobility” issue. In that case, it’s essential to consult with a physical therapist. A physical therapist can perform a differential diagnosis examination to identify whether the limitation is due to joint structures, bone shape, or muscular inhibition.
Targeting the Joint Capsule: Step One – Put the Muscle on Slack
If we want to work on the joint capsule directly, the first step is to put the surrounding muscles on slack. Why? Because otherwise, the muscle spindles within the muscles—specialized sensory receptors that detect changes in muscle length—will react to a stretch by trying to protect the muscle thus limit your range even further.
Additionally, the Golgi Tendon Organ (GTO), which monitors muscle tension during contraction can also alert the body to limit the ability to gain further range. Understanding how these systems work gives us a framework for progressing our mobility training in a smarter way.
Step Two – Load It Up
Once the muscle is on slack, the next step is to load the joint—but how much load are we talking about?
It depends on the joint. For example, ankles can typically tolerate 40–50 pounds of load in mobility drills, while areas such as the spine may only need 20–30 pounds due to the smaller sizes of muscles along the veretbrae. Size matters here: hips and legs can usually handle more load than smaller regions like the shoulders or spinal muscles. The body can also progress and adapt to larger loads over time. (hint progressive overload)
So… What Does This Have to Do With Kettlebells?
Everything. Some of the best loaded mobility drills incorporate kettlebells (KBs). When done correctly, they challenge joint range, stimulate the nervous system, and build strength and control in the surrounding muscles and tissues because it’s easier to load at heavier loads.
Here are some examples of effective loaded mobility drills:
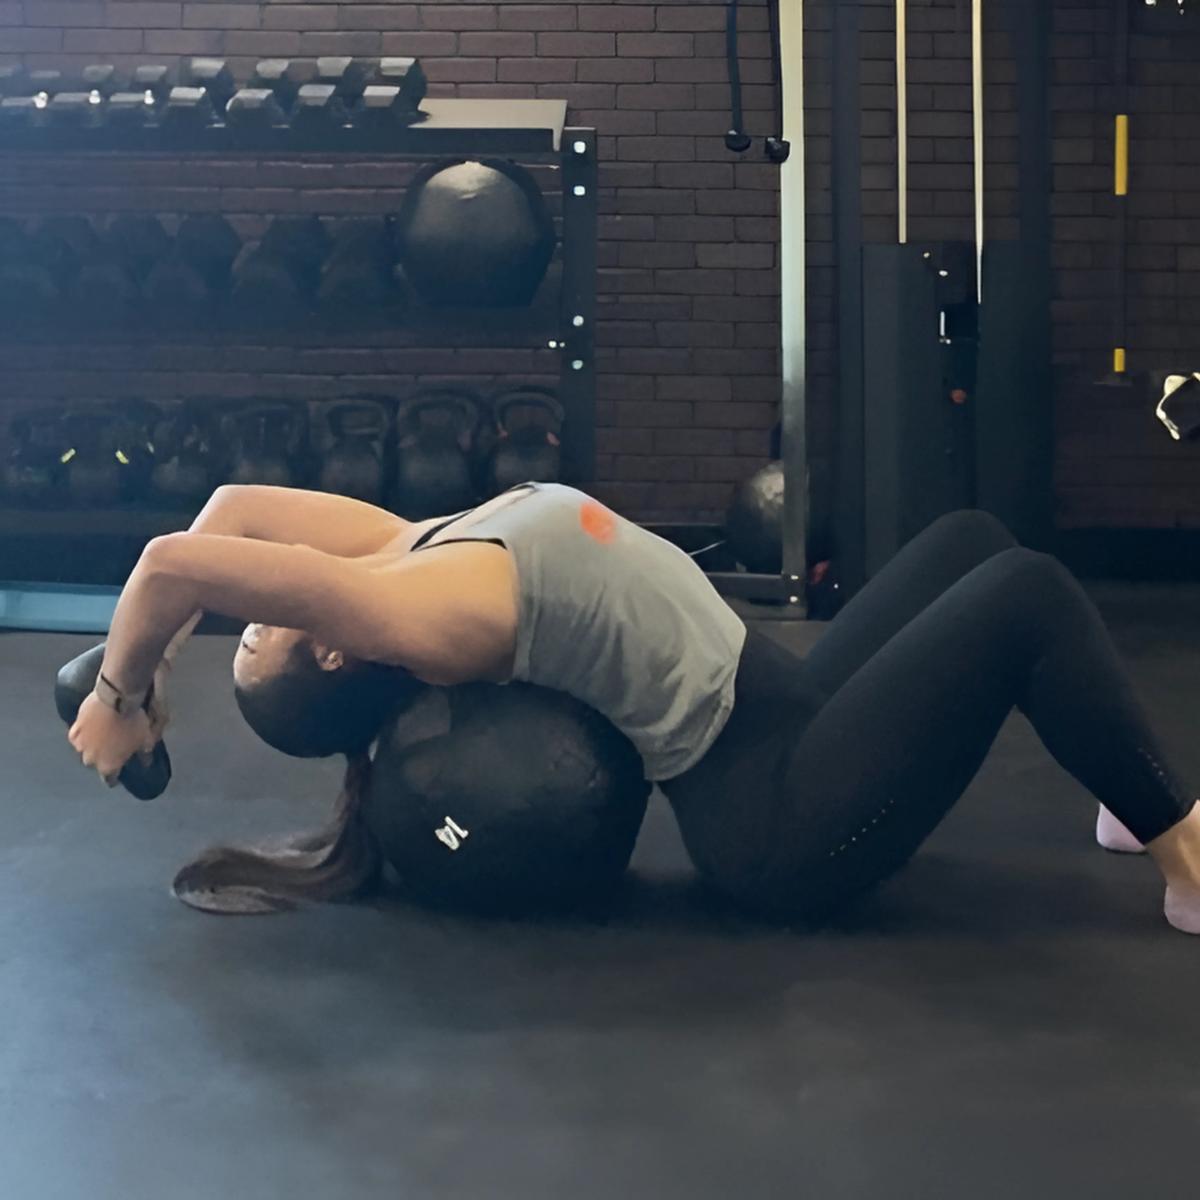
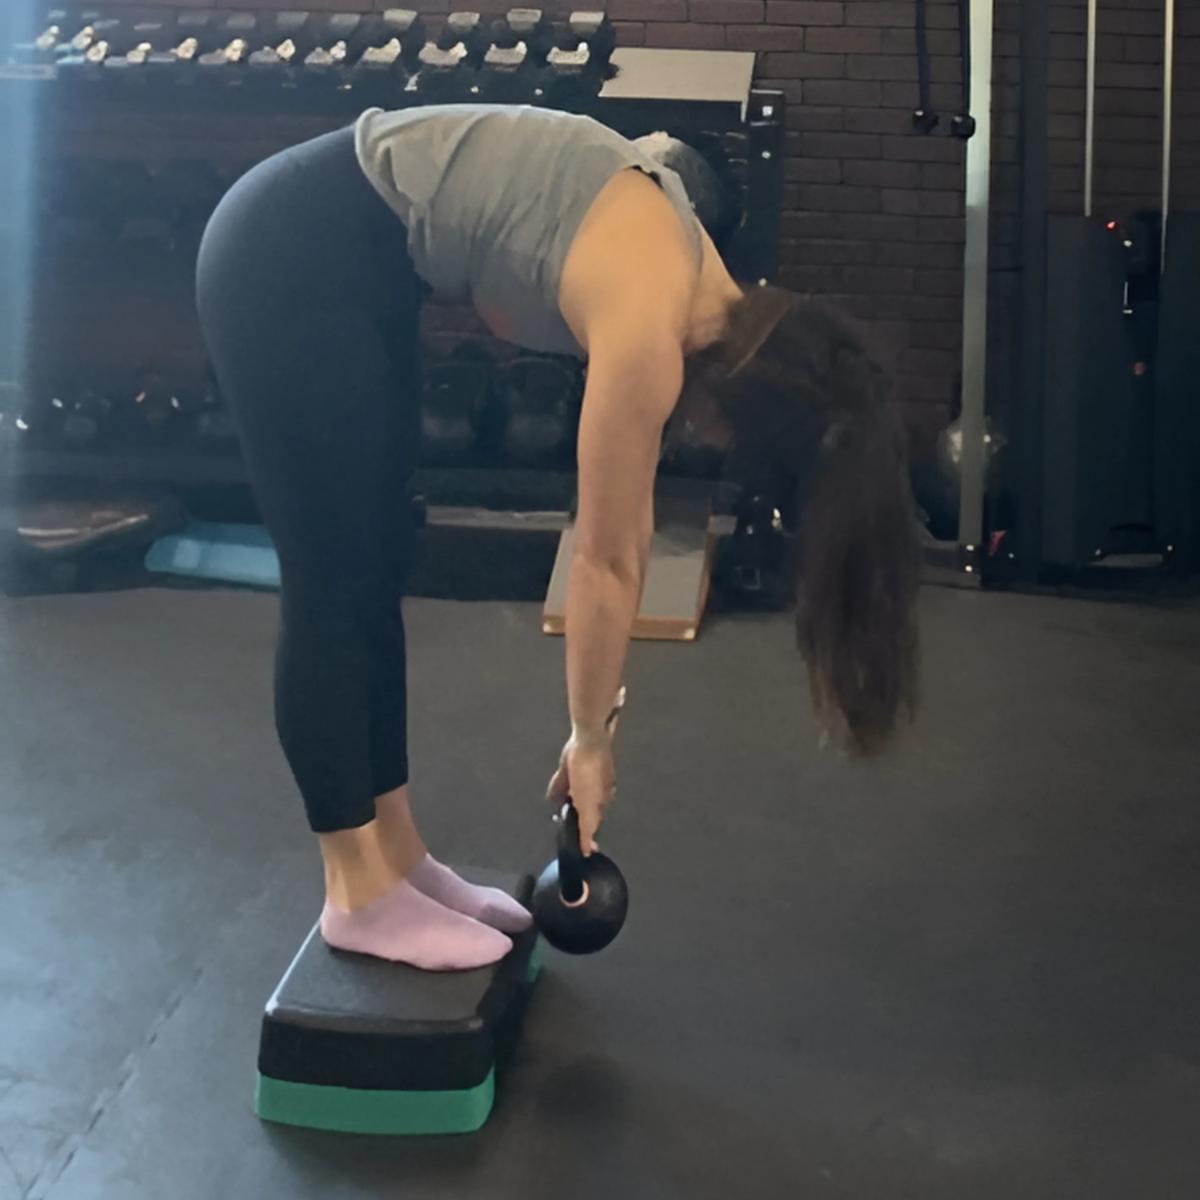
- Jefferson curls
- Medicine ball extensions
- Adductor leans
- Loaded knee flexion on a bench (for dorsiflexion or knee flexion)
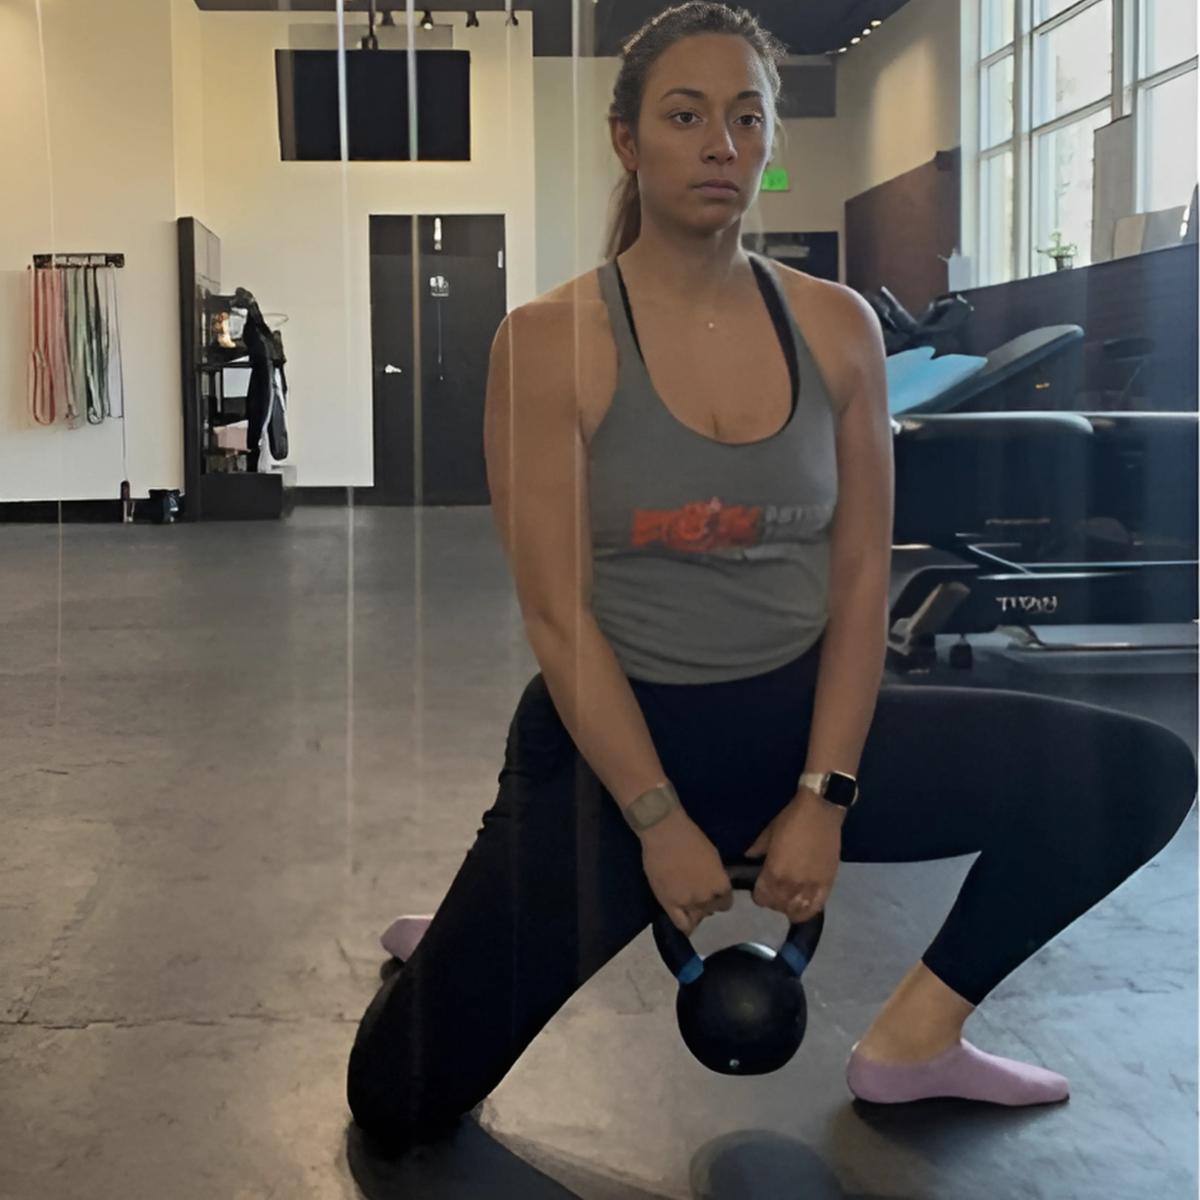
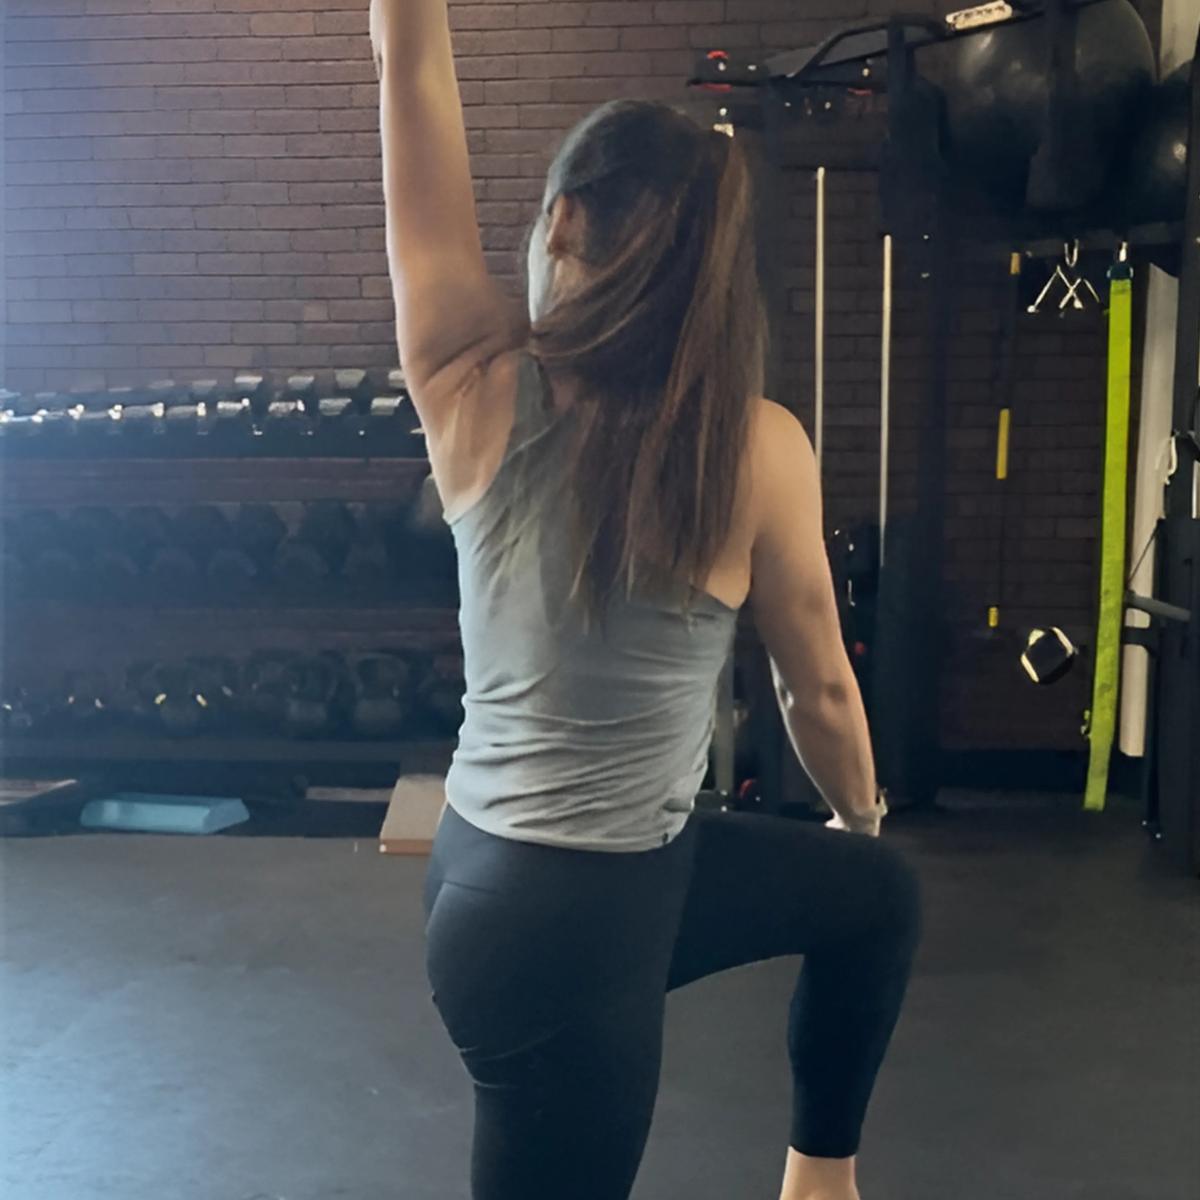
- Half rotation + overhead press
- Farmer carries (great for wrist and elbow traction)
- Sidelying abduction for the OH motion with the shoulder
The key takeaway? Move through your full range of motion—under load.


NEXT: Applying the Concept to Flexibility
Let’s not forget the muscle side of the equation. You’ve probably heard something like:
“My glutes feel so tight, but I do pigeon pose all the time. It feels better for a little bit, then tightens right back up.”
According to The Science of Stretch, muscles generate greater tension at shorter lengths—meaning a shortened (and likely weak) muscle will always feel tighter. Weak muscles also tend to resist lengthening, making static stretching less effective long term.
So how do you know if your limitation is due to muscles or joints? Consider where you’re feeling the tightness.
- Muscular restrictions are usually broad and spread out throughout the length of the
- Joint restrictions often feel deep and localized, especially at the proximal or distal ends of bones (with the exception of the spine)
Once again, a physical therapist can help determine the root cause with a thorough assessment. So What CAN You Do?
Load it. Start with isometric contractions—these are easier for the nervous system to manage and help weak muscles activate without lengthening. Isometrics and concentric movements recruit more motor units, which leads to better strength gains and more efficient movement. The more motor units you can recruit to the muscles, the stronger and more adaptable your body becomes aka GAINS.
Eccentric loading (lengthening under tension) is also important, but it demands greater control and tolerance.
The Bottom Line
So, are we saying you should load your body no matter what? YES. LOAD IT and attempt to perform activities of mobility and flexibility within your full tolerable ROM.
Just make sure you’re working with the right health professional to help guide you. Whether it’s improving mobility, flexibility, or building resilience—there’s a smart way to do it, and that starts with understanding how your body works.